
Step-by-Step screenshot to Install MySQL 8.0 on Ubuntu 20.04
MySQL Community Edition is a freely downloadable version of the world’s most popular open-source database that is supported by an active community of open-source developers and enthusiasts.
MySQL 8.0 has important performance and security improvements, and, as in all migration to a new database version. This is the latest version of MySQL.
I will share the step-by-step screenshot to install MySQL 8.0 on Ubuntu 20.04.
Command to check the version of Ubuntu, see the image-1
lsb_release -a
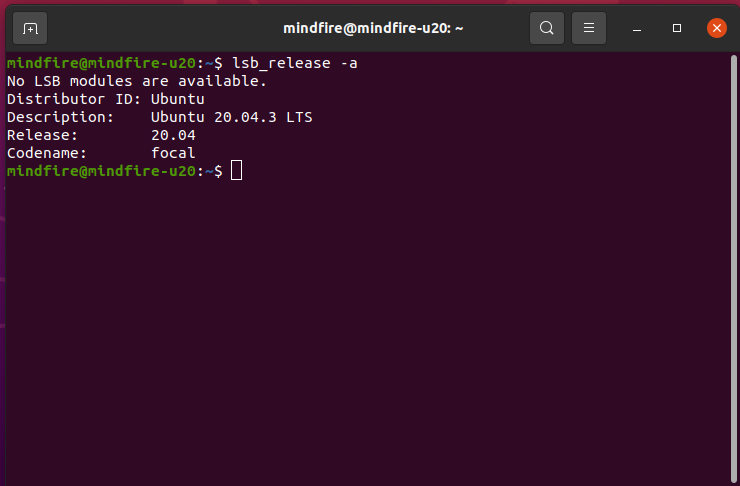
Image-1
Now run the below command to updates the package lists for upgrades for packages
sudo apt update
Add repository for MySQL in ubuntu
Ubuntu 20.04 comes with the default MySQL version, as we are trying to install MySQL 8.0, Do add this below command to add the repository as per image-2
wget https://repo.mysql.com//mysql-apt-config_0.8.18-1_all.deb
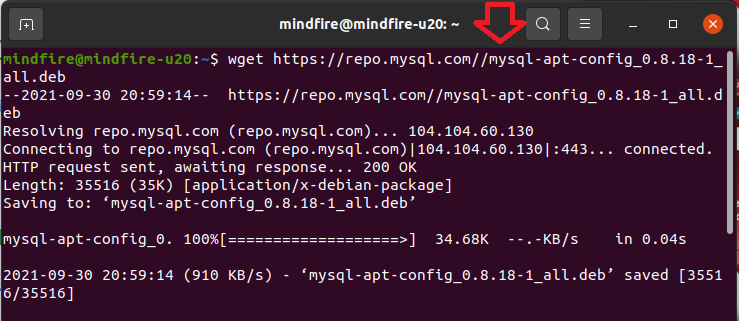
Image-2
It will take few seconds to download and then run the below command for the installation as per image-3
sudo dpkg -i mysql-apt-config_0.8.18-1_all.deb

Image-3
Select the first option is selected as MySQL 8.0 then select OK as per image-4
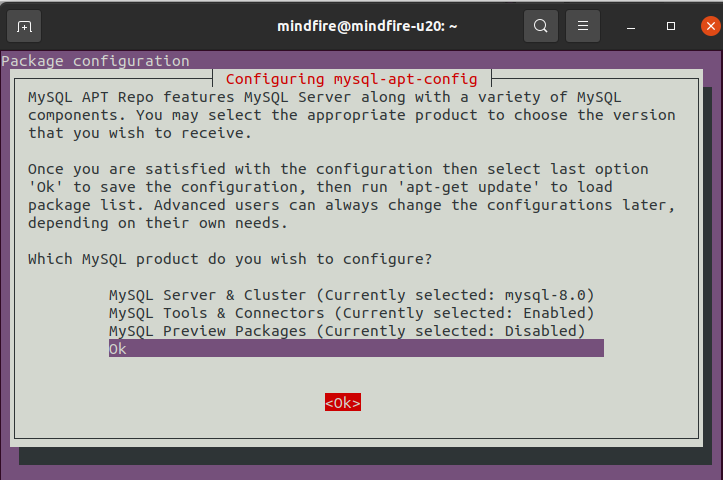
Image-4
In the next option select MySQL 8.0 Server and click OK as per image-5
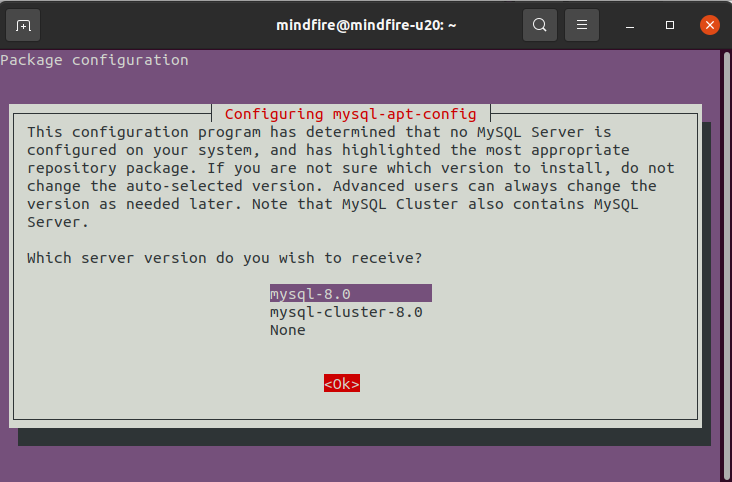
Image-5
Drop down to OK again as MySQL is selected to start the installation.
Run the below command to update the package list
sudo apt update
Now search for MySQL 8.0 using apt cache as shown below as per the image-6
sudo apt-cache policy mysql-server
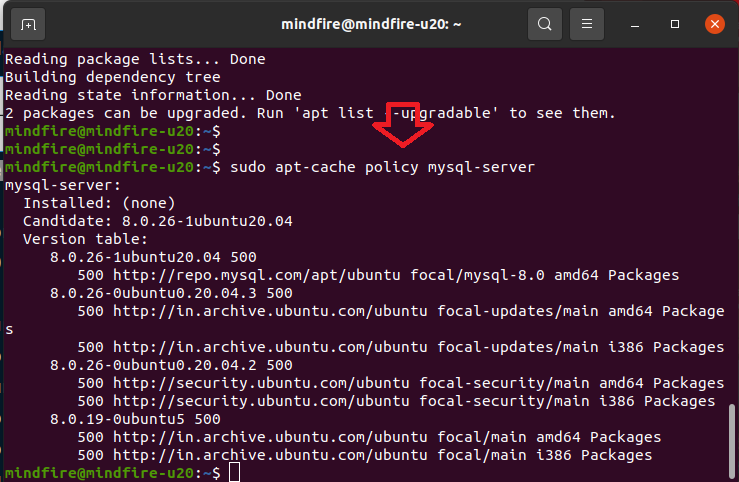
Image-6
Now install MySQL 8.0 in Ubuntu 20.04
As we can see MySQL 8.0 found in our system, we are going to install MySQL 8.0 Server and client with the below command
sudo apt install mysql-community-server mysql-server mysql-client -y
The installation will start, I have added -y in the above command so that it won’t ask that additional disk space confirmation.
Enter MySQL root user password and confirm password as per the image-7
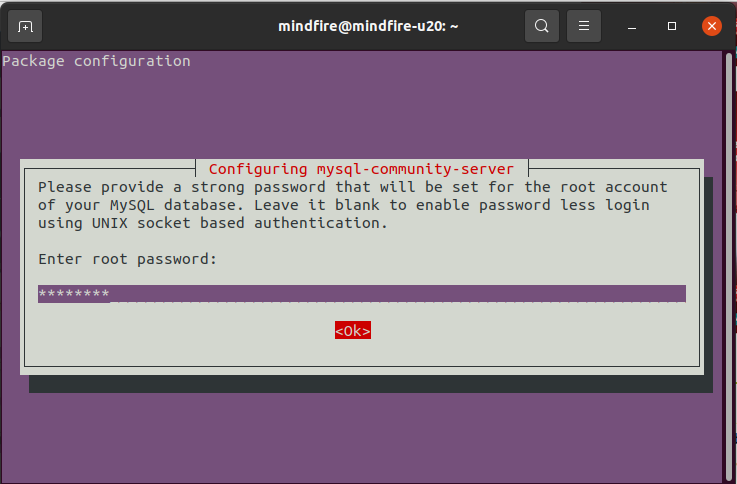
Image-7
The installation will be done on the next screen, do follow the onscreen command as per image-8
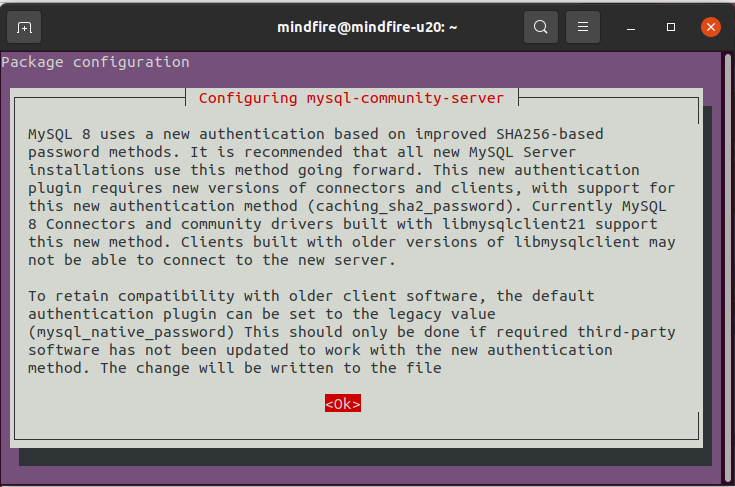
Image-8

Image-9
Now connect to MySQL to check the installed version of MySQL. To connect to MySQL, run the below command as per the image-10
sudo mysql -u root -p
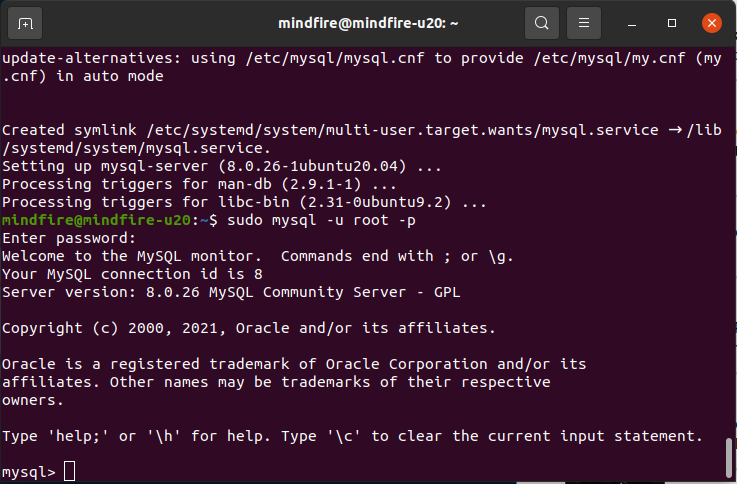
Image-10
Now to check the version of MySQL, type the below command after login to mysql as per the image-11
select version();
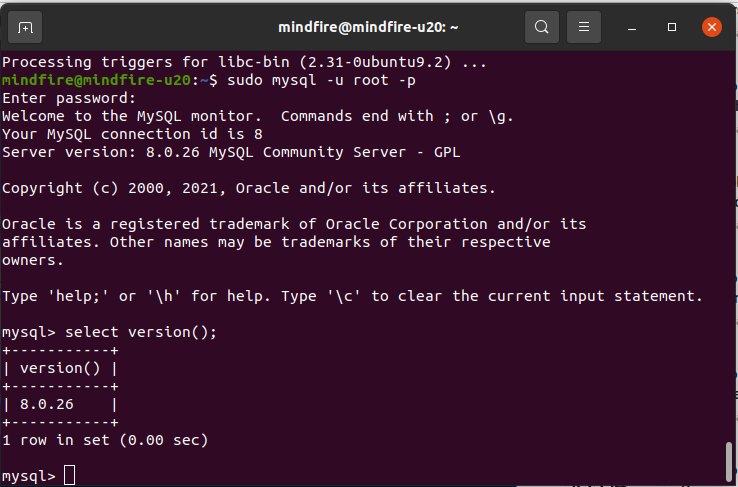
Image-11
Hope I have explained with Step by Step screenshot to Install MySQL 8.0 on Ubuntu 20.04

![[Fixed] ‘Oversized’ OST File issues in Outlook using Manual Tricks](https://www.lifeonnetwork.com/wp-content/uploads/2021/10/outlookimage-150x150.png)